TL;DR
If you haven’t tried setting up a CVP lab in a couple of years, things have changed.
Getting Started with Cloud Vision Portal
Getting Arista’s Cloud Vision Portal (CVP) server running in a lab environment is just a bit more difficult than four years ago. The OVA is much more CPU and Memory hungry. The installation of CVP is out of scope for this document but you can find out all you need to know here: CPV setup information. HIP TIP-O-THE-WEEK! You can use google’s time server….easy! time.goole.comGo here, you will need a valid account to download a copy of the CVP, I would suggest the 2020.3 version for the lab. I tried using the latest and they made some changes to the installer. I was trying to install it on a laptop with 16 G RAM and it never finished installing. I finally deployed the OVA on my trusty HPE DL360 ESXi server but it was the 2020 version because that’s the one I previously downloaded. I am sure the latest will work just the same.
Follow the guide for a single-node deployment. When the install is finished it will say the CVP successfully deployed. When your VM is running, you can proceed. If it looks like it’s hanging at the install after it says “This may take a few minutes”, chances are you do not have enough system resources. Get more!
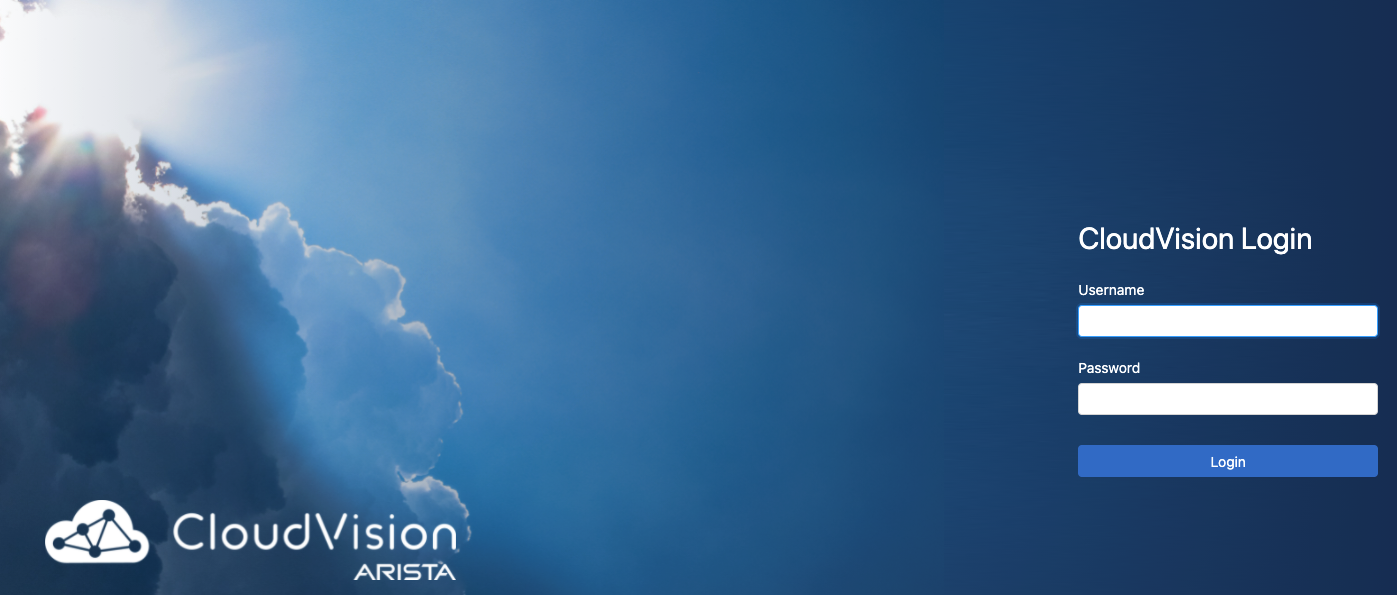
OK, good, CVP up and operational and you are ready to log in for your first time. Great!
NOTE: Let’s assume we used ‘cvpadmin’ as the username assigned to your CVP instance, and ‘mypass’ for the password.
When we first logged into CVP we were directed to change the password. The password used for the initial setup script is the password we will use for logging into the CVP.
EXCEPT FOR THE FIRST TIME!
The first time you try to access the CVP with a browser, you will use
‘cvpadmin’ for the username AND password……don’t ask. IDK.
Switch Configuration
You are going to need some switches to import into CVP. If you do not have any Arista switches laying around, you can create a few for this lab. You can run vEOS in a VM.Find out how to do that, here: Runiing Arista eos in a vm
Now let’s imagine you have a couple of switches in VM’s. Awesome. I have two switches and I had to do some preliminary configuration to get them ‘READY’ to be onboarded with the CVP. First things first, we may want to be enable ssh, although not necessary, what the heck, this is a lab, why not? From the CVP VM console inside vCenter, I can add the following commands:
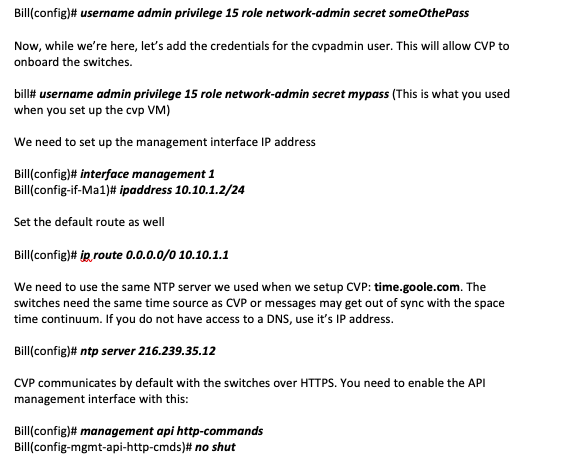
This should be enough to get you going as far as the switches are concerned. CVP should now be able to use the default https protocol to communicate with switches.
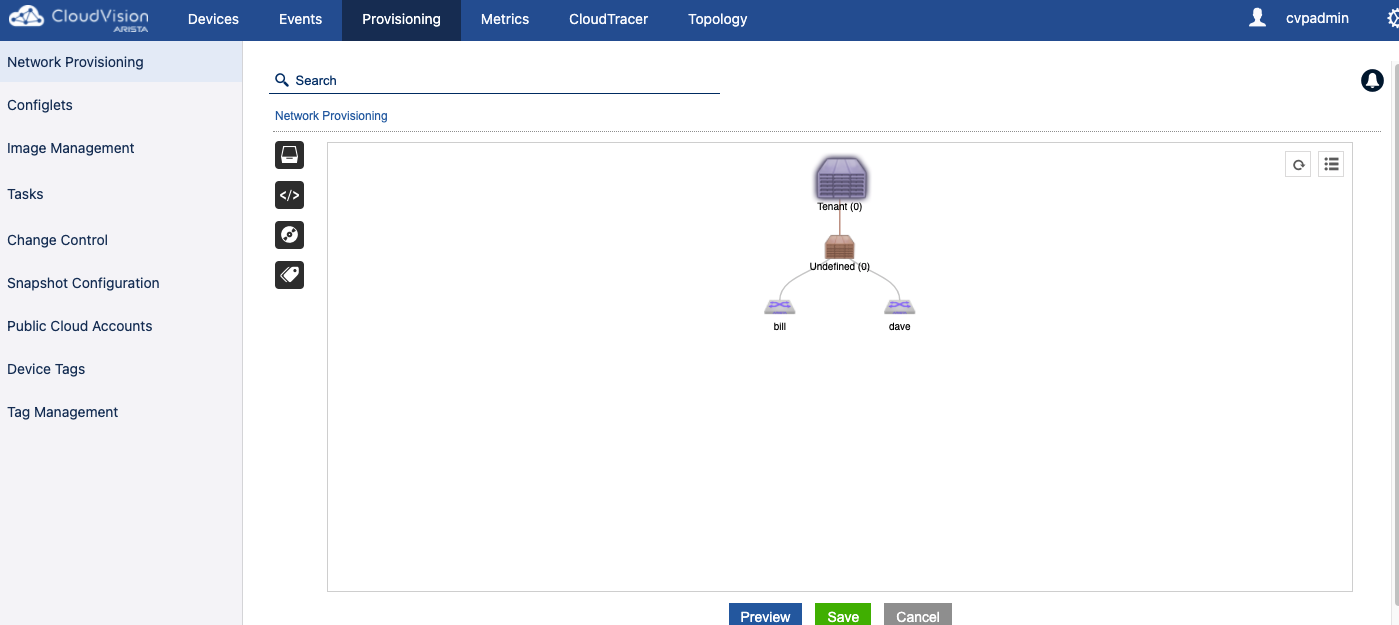
Onboarding switches into Cloud Vision Portal
After we’ve logged into the CVP we are ready to get the switches imported into it. We will look at the menu bar across the top of the page and click on ‘DEVICES’. Then, at the top right will be a button to ‘Add Devices’, click it! Now you have the onboarding devices screen and you will add the ip address of each of your switches, one per line, in the Register Devices box on the bottom, then click ‘Register’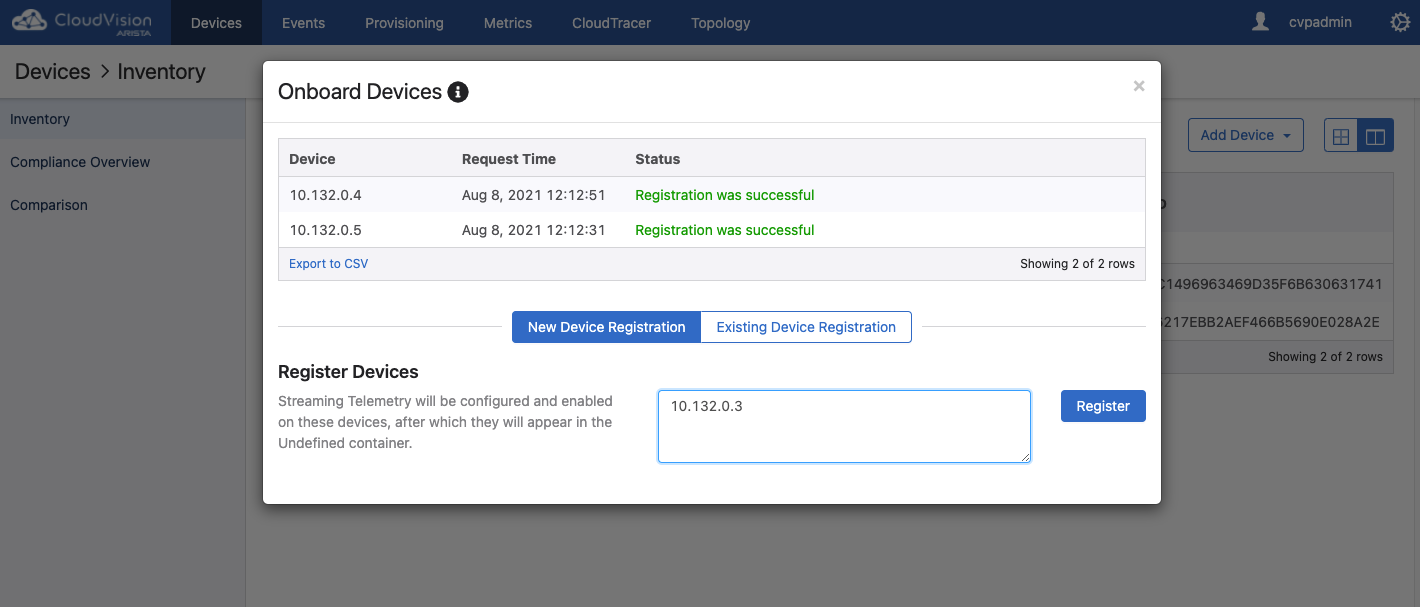
Once the devices are onboarded you will see them available in the Undefined container. You are now ready to fully manage the switches with Cloud Vision Portal